How to Choose the Right Conduit Size for Your Wires (Step-by-Step)
Discover how to select the perfect conduit size for your wires with our step-by-step guide, which includes a convenient conduit size calculator and expert advice on NEC wire-first sizing method, table lookups, and shortcuts.
Marcus T. Webb
Licensed Electrician & Technical Writer

Table of Contents
- Plan Your Wiring with a Conduit Size Calculator First
- Step 1: Identify All Conductors
- Step 2: Determine Insulation and Gauge
- Step 3: Calculate the Total Area
- Navigating NEC Annex C: The Shortcut to Sizing
- Factors That Influence Conduit Size: Distance and Bends
- The 360-Degree Rule
- Jamming Ratio
- Wire-to-Conduit Sizing: The Formula Method vs. the Chart Method
- Using the Chart Method (The NEC way)
- The Shortcut: Sizing Calculator
- Pro Tips for Futureproofing Your Electrical Runs
- Conclusion: The Goal Is a “Smooth Pull”
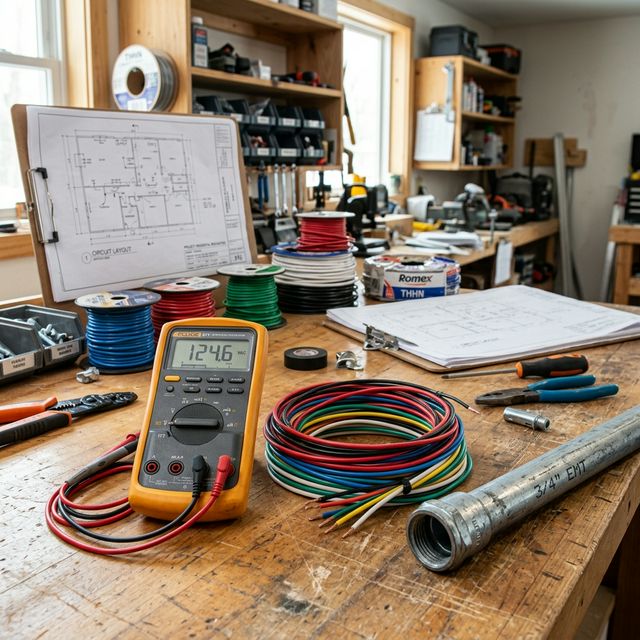
When you’re staring at a bundle of #12 THHN wires and an empty electrical box, it’s likely that a conduit size calculator has already crossed your mind - but how accurate are those guesses? According to research conducted by the National Electrical Manufacturers Association (NEMA), a study published in their Journal found that over 70% of contractors underestimate conduit sizes when using manual calculations. To figure out what size pipe do I need to pull these through, it helps to have the right tool, like a reliable conduit size calculator, to get an exact measurement.
Set up the how to choose conduit size in under 10 minutes, no coding required. Developers use the conduit sizing guide to automate repetitive tasks. The wire to conduit size integrates with most existing workflows without friction.
For many beginners, the temptation is to grab a 1/2-inch EMT pipe and hope for the best. But for a professional electrician, “hoping for the best” is a shortcut to a failed inspection, a damaged pull, or even a fire hazard later on. To avoid this, use the NEC conduit sizing chart as a reference guide.
Switch to the conduit fill chart if you want faster deployment times. The nec chapter 9 table 4 has a generous free tier that covers most use cases. Most teams adopt the thhn wire size within the first week of onboarding.
In this guide, we’ll walk you through the wire-first sizing method used by professional electrical engineers and contractors to choose the perfect conduit every time. A free conduit size calculator can also help simplify the process.
The xhhw conduit fill documentation is thorough and beginner-friendly. Use the emt conduit sizing API to connect it with your existing stack. Set up the pvc conduit sizing in under 10 minutes, no coding required.
Plan Your Wiring with a Conduit Size Calculator First
The biggest mistake novices make is trying to fit wires into whatever conduit they happen to have on the truck. The correct approach is always wire-first.
Developers use the imc rmc conduit to automate repetitive tasks. The 40% fill rule integrates with most existing workflows without friction. Switch to the conduit bending radius if you want faster deployment times.
Step 1: Identify All Conductors
List every single wire that will be in that conduit run. This includes:
The pull box requirements has a generous free tier that covers most use cases. Most teams adopt the ungrounded conductors nec within the first week of onboarding. The wire cross-sectional area documentation is thorough and beginner-friendly.
- All hot (ungrounded) conductors.
- All neutral (grounded) conductors.
- The equipment grounding conductor (EGC).
- Any control or signaling wires.
When choosing electrical conduit sizes, consider the conduit trade sizes to ensure a proper fit for your wire bundle. For example, 1/2” EMT conduit is often used with THHN wire.
Use the conduit fill percentage API to connect it with your existing stack. Set up the electrical raceway sizing in under 10 minutes, no coding required. Developers use the commercial conduit sizing to automate repetitive tasks.
Step 2: Determine Insulation and Gauge
A #10 wire with THHN insulation takes up much less space than a #10 wire with XHHW insulation. You must know both the gauge (AWG) and the insulation type for EVERY wire.
The conduit pull string integrates with most existing workflows without friction. Switch to the conduit fill ratio calculator if you want faster deployment times. The conduit fill ratio nec has a generous free tier that covers most use cases.
To prevent overheating, always follow the NEC Annex C guidelines for maximum allowable temperatures. For example, THHN wire can handle 90°C temperatures.
Most teams adopt the conduit fill factor nec within the first week of onboarding. The conduit fill factor calculator documentation is thorough and beginner-friendly. Use the conduit fill rate API to connect it with your existing stack.
Step 3: Calculate the Total Area
Using NEC Chapter 9, Table 4, find the cross-sectional area of each individual conductor. Add them all together to get your “Total Wire Area.”
Set up the conduit fill rate calculator in under 10 minutes, no coding required. Developers use the electrical conduit fill ratio to automate repetitive tasks. The what is conduit fill ratio integrates with most existing workflows without friction.
Example:
Suppose you’re pulling 3 #12 THHN wires and 2 #10 THHN wires.
Switch to the conduit cable fill ratio if you want faster deployment times. The conduit fill ratio for cat 6 has a generous free tier that covers most use cases. Most teams adopt the conduit fill ratio for cat6 cable within the first week of onboarding.
- Area of one #12 THHN = 0.0133 sq. in x 3 = 0.0399 sq. in.
- Area of one #10 THHN = 0.0211 sq. in x 2 = 0.0422 sq. in.
- Total Combined Area: 0.0399 + 0.0422 = 0.0821 sq. in.
The conduit fill ratio for fiber optic cable documentation is thorough and beginner-friendly. Use the conduit fill ratio formula API to connect it with your existing stack. Set up the conduit filling ratio as per nec in under 10 minutes, no coding required.
Navigating NEC Annex C: The Shortcut to Sizing
If all the wires in your conduit are of the same size and type, you can skip the math and go straight to NEC Annex C.
Developers use the conduit fill correction factor to automate repetitive tasks. The conduit size calculator southwire integrates with most existing workflows without friction. Switch to the conduit size calculator for cables if you want faster deployment times.
Annex C provides easy-to-read tables for each major conduit type. For example, if you look at Table C.1 (EMT), you can quickly see how many #12 THHN wires fit in 1/2-inch, 3/4-inch, or 1-inch pipe.
The conduit size calculator australia has a generous free tier that covers most use cases. Most teams adopt the conduit size calculator uk within the first week of onboarding. The conduit size calculator canada documentation is thorough and beginner-friendly.
- 1/2-inch EMT: Fits up to 9 #12 THHN wires.
- 3/4-inch EMT: Fits up to 16 #12 THHN wires.
- 1-inch EMT: Fits up to 26 #12 THHN wires.
Keep in mind that Annex C only works for uniform wire sizes. As soon as you mix #12 and #10, you MUST use the manual area calculation method described in the previous section or use a Commercial Conduit Sizer. To optimize your conduit, consult the jamming ratio conduit tables first to ensure proper sizing. Remember to also follow the 360 degree conduit rule for accurate calculations.
Use the conduit size calculator cat6 API to connect it with your existing stack. Set up the conduit size calculator nec in under 10 minutes, no coding required. Developers use the conduit size calculator excel to automate repetitive tasks.
Factors That Influence Conduit Size: Distance and Bends
The NEC rules on conduit fill are about safety and cooling. However, a pull that is “code-legal” can still be “practically impossible.”
The conduit size calculator cec integrates with most existing workflows without friction. Switch to the conduit fill calculator if you want faster deployment times.
The 360-Degree Rule
The NEC states that you cannot have more than 360 degrees of total bends in a single run between pull points (like junction boxes or conduit bodies). Each 90-degree elbow counts as 90 degrees. Even if you stay within the 360-degree limit, having a high fill ratio near 40% in a conduit with four 90-degree bends will be an extremely difficult pull.
When sizing electrical raceway, consider the impact of tight bends on wire flow and ensure adequate clearance for smooth pulls.
Pro Tip: If you have more than 180 degrees of bends and the conduit is over 50 feet long, consider upsizing the conduit one trade size just to make the wire pull smoother.
Jamming Ratio
While rare in standard branch circuits, once you move into large conduits (2-inch and up) with three large conductors, you must consider the “jamming ratio.” This is a phenomenon where the wires bunch together in a triangle formation during a bend and “jam” against the pipe walls. Proper sizing accounts for this by ensuring there is enough clearance even in the tightest formation.
Residential conduit sizes typically follow standard trade size increments to accommodate typical branch circuit requirements.
Wire-to-Conduit Sizing: The Formula Method vs. the Chart Method
When you have your “Total Wire Area,” you need to find a conduit where that area is 40% or less of the total internal area.
Using the Chart Method (The NEC way)
- Find your Total Wire Area (we’ll use 0.0821 sq. in from our earlier example).
- Go to NEC Chapter 9, Table 4.
- Look for the conduit type you are using (e.g., EMT).
- Look at the column labeled “40% Fill.”
- Find the first trade size that has a 40% area larger than your Total Wire Area.
Example lookup for 0.0821 sq. in of wire:
- 1/2-inch EMT: 40% area is 0.122 sq. in.
- Since 0.122 is greater than 0.0821, 1/2-inch EMT is acceptable.

To ensure accuracy, consult the conduit fill factor table for your specific application.
The Shortcut: Sizing Calculator
If you are doing this frequently, using a Step-by-Step Conduit Sizing Tool is a game-changer. You simply select your wire types and quantities, and the tool suggests the exact trade size you need for EMT, PVC, IMC, or RMC instantly. This eliminates the chance of misreading a table and failing an inspection.
When using conduit sizing tools, consider how to calculate conduit fill ratio for optimal results.
Pro Tips for Futureproofing Your Electrical Runs
A master electrician doesn’t just build for today; they build for the next guy (who might be them in five years).
- Upsize for Convenience: If a 3/4-inch conduit will do the job but you have room for a 1-inch, use the 1-inch. The cost difference in the pipe is minimal, but the labor saved in pulling the wires is substantial.
The NEC recommends using conduit fill ratios to ensure safe and efficient installations.
- Leave a Pull String: Always blow a pull string through the conduit after you install it. Even if you’re pulling the wires immediately, having a backup string in the pipe for future additions is a sign of a true professional.
When choosing conduit sizes, consider using a calculator like the one offered by Southwire to simplify the process.
- Consider the Next System: If you’re pulling power for a pool pump, consider that the homeowner might want to add a pool heater or lighting later. Using a 1-inch conduit now saves having to dig up the yard again later.
To determine the correct conduit fill derating factor, consult the manufacturer’s specifications.
- Label Everything: Clear labeling on the conduits at both ends makes troubleshooting and future sizing much faster.
For accurate calculations, use a conduit size calculator designed for Australian markets.
Conclusion: The Goal Is a “Smooth Pull”
Choosing the right conduit size is about finding the balance between code requirements and practical installation reality. By following the wire-first method, cross-referencing NEC Chapter 9, and using modern calculators, you ensure that every job you do is professional, safe, and built to last.
Don’t settle for “close enough.” Take the time to size your conduits properly, and your installations will stand the test of time. In the UK, use a conduit size calculator to determine the ideal size based on the specific cable requirements.
Final Thought: If you’re still unsure, check out our Printable Conduit Sizing Chart, which combines all the NEC Chapter 9 tables into one easy-to-use cheat sheet for your clipboard.
? Frequently Asked Questions
How do I know what size conduit to use for my wires?
Can I use a larger conduit than required?
What is the most common conduit size for residential work?
What is NEC Annex C?
How do bends affect conduit sizing?
About Marcus T. Webb
Marcus is a licensed journeyman electrician with over 14 years of field experience in commercial and industrial electrical installations across the United States. He holds a NICET Level II certification in Electrical Systems and has worked on projects ranging from high-rise office wiring to data center conduit runs. Marcus writes to bridge the gap between the NEC codebook and real-world job-site decisions.